

Introduction
A sprinkler system is one of the most effective ways to keep your lawn and landscaping healthy while saving time and conserving water. But installing one is more than just laying pipes and sprinkler heads — proper preparation ensures your system works efficiently, avoids future problems, and delivers even coverage across your yard.
If you are considering installing a sprinkler system, preparation is the key to success. From clearing the yard and marking utilities to assessing water supply and planning irrigation zones, every step matters. This guide walks you through the essential steps to get your yard ready.
Step 1: Clear the Yard of Debris and Obstacles
Before any digging begins, your yard should be as clean and accessible as possible.
- Remove debris: Clear away sticks, rocks, toys, or any items that might obstruct trenching or damage equipment.
- Relocate furniture and decor: Move grills, patio furniture, planters, and other objects away from the work area.
- Trim landscaping: Overgrown bushes or tree branches can block sprinkler spray or get in the way of installers.
A cleared yard ensures smooth installation and prevents damage to both your property and the system.
Step 2: Mark Underground Utilities for Safety
Perhaps the most critical step is identifying underground hazards. Damaging a utility line can be dangerous and costly.
- Call before you dig: In most regions, you can contact a local “call before you dig” hotline for free marking of utility lines.
- Use flags or spray paint: Mark areas where gas, electric, water, or cable lines are located.
- Communicate with your installer: Provide a map or walk-through of marked lines so they can design the system around them.
Skipping this step can delay your project and pose serious safety risks.
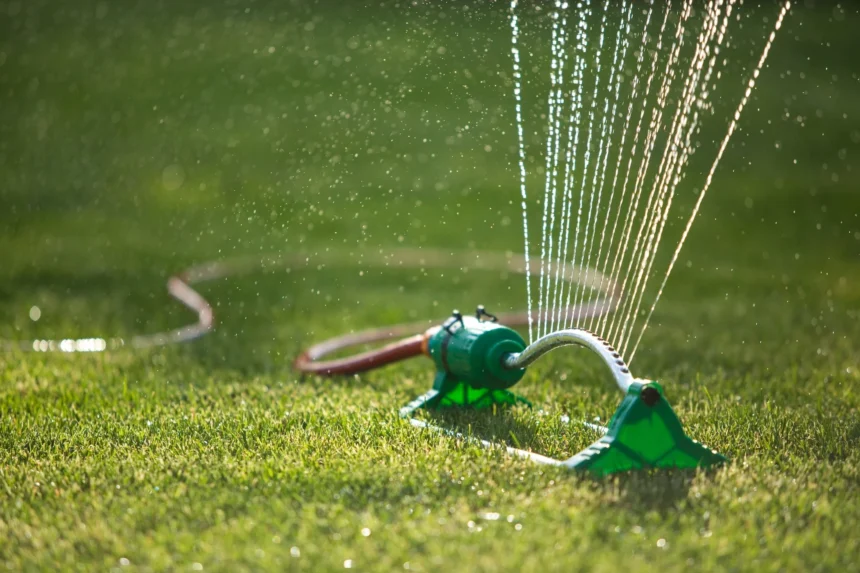
Step 3: Assess Your Water Supply and Pressure
A sprinkler system relies on adequate water flow and pressure to function properly.
- Locate the water source: Determine whether you’ll connect to an outdoor spigot, main water line, or a well.
- Check water pressure: Use a gauge to test pressure at the spigot. Most systems require 30–50 PSI to operate efficiently.
- Evaluate flow rate: Fill a five-gallon bucket and time how long it takes to fill. This helps determine how many sprinkler heads can run at once.
- Inspect plumbing: Ensure pipes and valves are in good condition to handle added demand.
If your water supply is weak, you may need booster pumps or more zones to balance flow.
Step 4: Plan Your Landscaping Layout
The efficiency of your sprinkler system depends on how well it matches your yard’s layout.
- Identify turf areas: Lawns usually require regular, even watering.
- Consider gardens and flower beds: These may need drip irrigation instead of spray heads.
- Account for shaded vs. sunny zones: Shaded areas need less water, while sunny spots dry out faster.
- Think about future projects: If you plan to add patios, walkways, or new trees, include them in your design.
By planning ahead, you avoid costly rework later when your landscape changes.
Step 5: Identify Slopes and Drainage Issues
Uneven terrain can impact water distribution.
- Look for low spots: Water pooling here can drown grass and damage roots.
- Fill or re-grade problem areas: Leveling the ground ensures water spreads evenly.
- Check slopes: Steep slopes may need specialized sprinkler heads or shorter run times to prevent runoff.
Addressing drainage problems before installation ensures your system performs effectively.
Step 6: Outline Irrigation Zones
Dividing your yard into zones ensures each section receives the right amount of water.
- Group areas with similar needs: Lawns, gardens, and shrubbery may all require different watering schedules.
- Account for sun exposure: Separate sunny and shaded zones for efficiency.
- Plan drip vs. spray: Drip irrigation works best for flower beds or shrubs, while spray heads cover lawns.
Zones are the backbone of an efficient system, preventing both overwatering and underwatering.
Step 7: Prepare Access for Installers
Contractors need easy access to work efficiently.
- Unlock gates or fences: Ensure the work area is fully accessible.
- Clear driveways and paths: Move vehicles or obstacles so trenching equipment can be brought in.
- Secure pets: Keep animals indoors to prevent accidents and ensure worker safety.
Small steps like these make the installation process faster and smoother.
Step 8: Schedule at the Right Time
Timing can affect installation quality and convenience.
- Avoid rainy weeks: Wet ground can make trenching messy and delay work.
- Install before peak summer: Preparing in spring ensures your system is ready when lawns need it most.
- Coordinate with landscaping projects: Installing sprinklers before laying sod or planting gardens saves time and prevents rework.
Proper timing minimizes disruption and maximizes system performance.
Conclusion
Installing a sprinkler system is a valuable investment for your home, but preparation is the foundation of success. By clearing debris, marking utilities, evaluating your water supply, and planning zones carefully, you help ensure that your system is efficient, safe, and tailored to your yard’s unique needs.
A well-prepared yard means smoother installation, fewer problems down the road, and a sprinkler system that keeps your lawn green and healthy for years to come.