

Loading a kayak onto your car doesn’t have to be a wrestling match or a source of anxiety before every waterside getaway. Whether you’re a seasoned paddler or planning your first family kayaking trip, knowing the proper technique to secure your kayak to your roof rack is essential for safety, peace of mind, and protecting your investment. In this guide, we’ll walk you through everything you need to know about transporting your kayak safely, from choosing the right equipment to mastering foolproof securing techniques that will keep your gear—and everyone on the road—safe.
Understanding Your Roof Rack System
Before you even think about hoisting your kayak onto your vehicle, it’s important to understand what type of roof rack system you’re working with. Not all roof racks are created equal, and the right setup can make the loading and securing process significantly easier.
Basic roof rack types include:
- Crossbar systems: The most common setup, featuring two bars that run perpendicular to your vehicle
- J-cradles: Designed to hold kayaks on their side, saving roof space
- Saddle-style racks: Cushioned supports that cradle the kayak’s hull
- Stacker systems: Allow you to carry multiple kayaks vertically
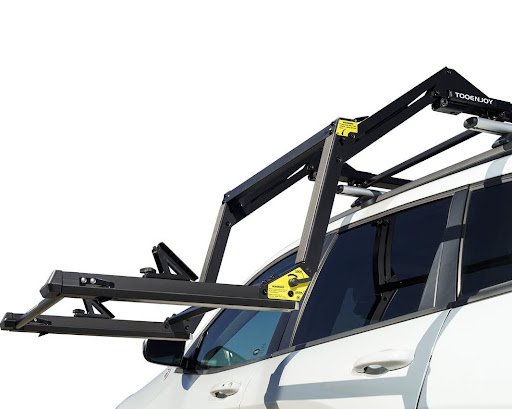
For those who struggle with the physical demands of lifting heavy kayaks overhead, an elevating roof rack for car can be a game-changer. These innovative systems lower to a comfortable loading height, then elevate to the roof position—eliminating the need for overhead lifting and making solo loading possible for virtually anyone.
Essential Equipment for Securing Your Kayak
Having the right gear is half the battle when it comes to safe kayak transportation. Here’s what you’ll need:
Must-Have Items:
- Cam straps or ratchet straps: Two straps minimum (four is better)
- Bow and stern tie-downs: Essential for preventing front-to-back movement
- Foam padding or pool noodles: To protect your kayak’s hull and vehicle’s roof
- Hood loops or anchor points: For attaching bow and stern lines
Optional But Helpful:
- Kayak loading assist pads or rollers
- Protective rack pads
- Bow and stern line with quick-release hooks
- Spare straps (always good to have backups)
Step-by-Step Guide to Securing Your Kayak
Step 1: Position Your Kayak Correctly
Place your kayak hull-down (cockpit facing up) across the crossbars. The kayak should be centered on your roof rack, with the front (bow) facing forward. If you’re using J-cradles or saddle racks, position the kayak according to the manufacturer’s instructions.
For sit-on-top kayaks, ensure any rigging or bungees don’t hang down where they could catch wind or snag.
Step 2: Attach the Main Straps
Thread your cam straps through or around the crossbars and over the kayak. Position one strap near the front third of the kayak and another near the back third—not at the very ends, where the hull is narrower and weaker.
Pro tip: Make sure straps lie flat without twists, as twisted straps can loosen during travel and create that alarming flapping sound at highway speeds.
Pull the straps tight, but not excessively so. You want firm pressure that prevents movement without deforming your kayak’s hull. A good rule of thumb: if you can easily lift or shift the kayak side-to-side, tighten more. If the hull shows signs of compression, loosen slightly.
Step 3: Secure the Bow and Stern
This step is non-negotiable and often overlooked by beginners. Roof rack straps alone aren’t sufficient—you need front and back tie-downs to prevent the kayak from sliding forward during hard braking or backward during acceleration.
Attach a line from the bow (front) of your kayak to a secure point under your front bumper or hood. Do the same for the stern (back) to a secure point at the rear. Pull these lines taut at about a 45-degree angle.
Safety check: Your kayak should not move more than an inch in any direction when you try to shift it by hand.
Step 4: Secure Loose Ends
Tuck away any loose strap ends. Long straps flapping in the wind aren’t just noisy—they can work loose over time or distract other drivers. Use the elastic keepers on your straps or tie off excess length.
Choosing the Right Kayak Roof Rack System
Investing in a quality kayak roof rack makes the entire process safer and more convenient. When shopping for a kayak rack for car applications, consider these factors:
Load capacity: Ensure your rack system can handle your kayak’s weight (typically 40-80 pounds for recreational kayaks)
Vehicle compatibility: Not all racks fit all vehicles—verify compatibility before purchasing
Ease of loading: Lift assist kayak rack systems are worth every penny if you frequently paddle solo or have physical limitations
Durability: Look for weather-resistant materials like powder-coated steel or aluminum
TooEnjoy offers innovative solutions that address common kayak transportation challenges, with systems designed to make loading easier and more secure for families and individual paddlers alike.
Common Mistakes to Avoid
Even experienced kayakers sometimes make these securing errors:
- Using worn or sun-damaged straps: UV exposure degrades strap material over time—inspect regularly
- Skipping bow and stern tie-downs: This is asking for trouble, especially at highway speeds
- Over-tightening straps: Can deform plastic kayaks, especially in hot weather
- Forgetting to check straps mid-trip: Stop after 15 minutes to verify everything remains tight
- Placing straps over cockpit edges: Can stress and crack the rim—strap over solid hull sections
Tips for Solo Kayak Loading
Loading a kayak by yourself doesn’t require superhuman strength—just smart technique:
- Park on level ground with the rear of your vehicle near a low wall or your kayak on a foam pad
- Lift the bow onto the rear crossbar first
- Walk to the stern and push the kayak forward onto both crossbars
- Center and secure as described above
Alternatively, consider a kayak roof rack with rollers or an elevating system that brings the rack down to waist height for effortless loading.
Best Practices for Highway Travel
Once your kayak is secured, keep these highway driving tips in mind:
- Reduced speed: Drive slightly slower than normal, especially in crosswinds
- Increased following distance: Your vehicle’s handling characteristics change with roof cargo
- Avoid sudden maneuvers: Roof-mounted kayaks increase wind resistance and raise your center of gravity
- Regular checks: During long trips, stop every hour to verify straps remain tight
- Parking awareness: Remember your increased height when entering parking garages or drive-throughs
Frequently Asked Questions
How tight should I secure my kayak to the roof rack?
Straps should be tight enough that the kayak cannot shift more than an inch in any direction, but not so tight that they deform the hull. Plastic kayaks are especially susceptible to compression damage.
Can I transport my kayak upside down?
Yes, many paddlers transport kayaks upside down (cockpit facing down) to reduce wind resistance and protect the cockpit from debris. Just ensure contact points are well-padded and straps are positioned over solid hull sections.
Do I really need bow and stern tie-downs?
Absolutely. These prevent your kayak from sliding forward or backward, which roof straps alone cannot prevent. They’re legally required in many jurisdictions and essential for safe transport.
What’s the maximum distance I can transport a kayak on my roof?
With proper securing, you can transport your kayak any distance. However, check straps periodically during long trips and be aware that extended sun and wind exposure can stress both your equipment and the kayak.
Final Thoughts
Mastering the art of securing your kayak to your roof rack transforms what could be a stressful prelude into a quick, confident routine. With the right equipment—including modern conveniences like lift assist kayak rack systems—and proper technique, you’ll spend less time wrestling with straps and more time enjoying the water with your family.
Remember, the few extra minutes spent double-checking your setup can prevent costly damage to your kayak, vehicle, or worse—an accident on the road. Invest in quality equipment, follow these proven techniques, and you’ll be ready for countless safe adventures ahead.
Now that your kayak is properly secured, where will your next family paddling adventure take you?